Getting Started with VIM Enterprise
Overview
VIM Enterprise is a desktop application which lets you convert your BIM projects into Power BI reports.
The application streamlines this process by:
-
✅ Automating and scheduling the creation of VIM files from Revit projects, ACC Revit projects, Navisworks projects, or IFC files.
-
✅ Uploading converted data into Azure Blob Storage so it can be queried and visualized in Power BI.
-
✅ Providing fully customizable Power BI reports to help you get started.
VIM Power BI Report Template
The VIM Power BI report template (.pbix) provided in the VIM Enterprise installer package lets you quickly visualize and share your model using Power BI. The report template comes with a variety of pages which can be customized to suit your needs.
Best Practices Page
In the "Best Practices" dashboard page, you get a general overview of the health of your BIM model.

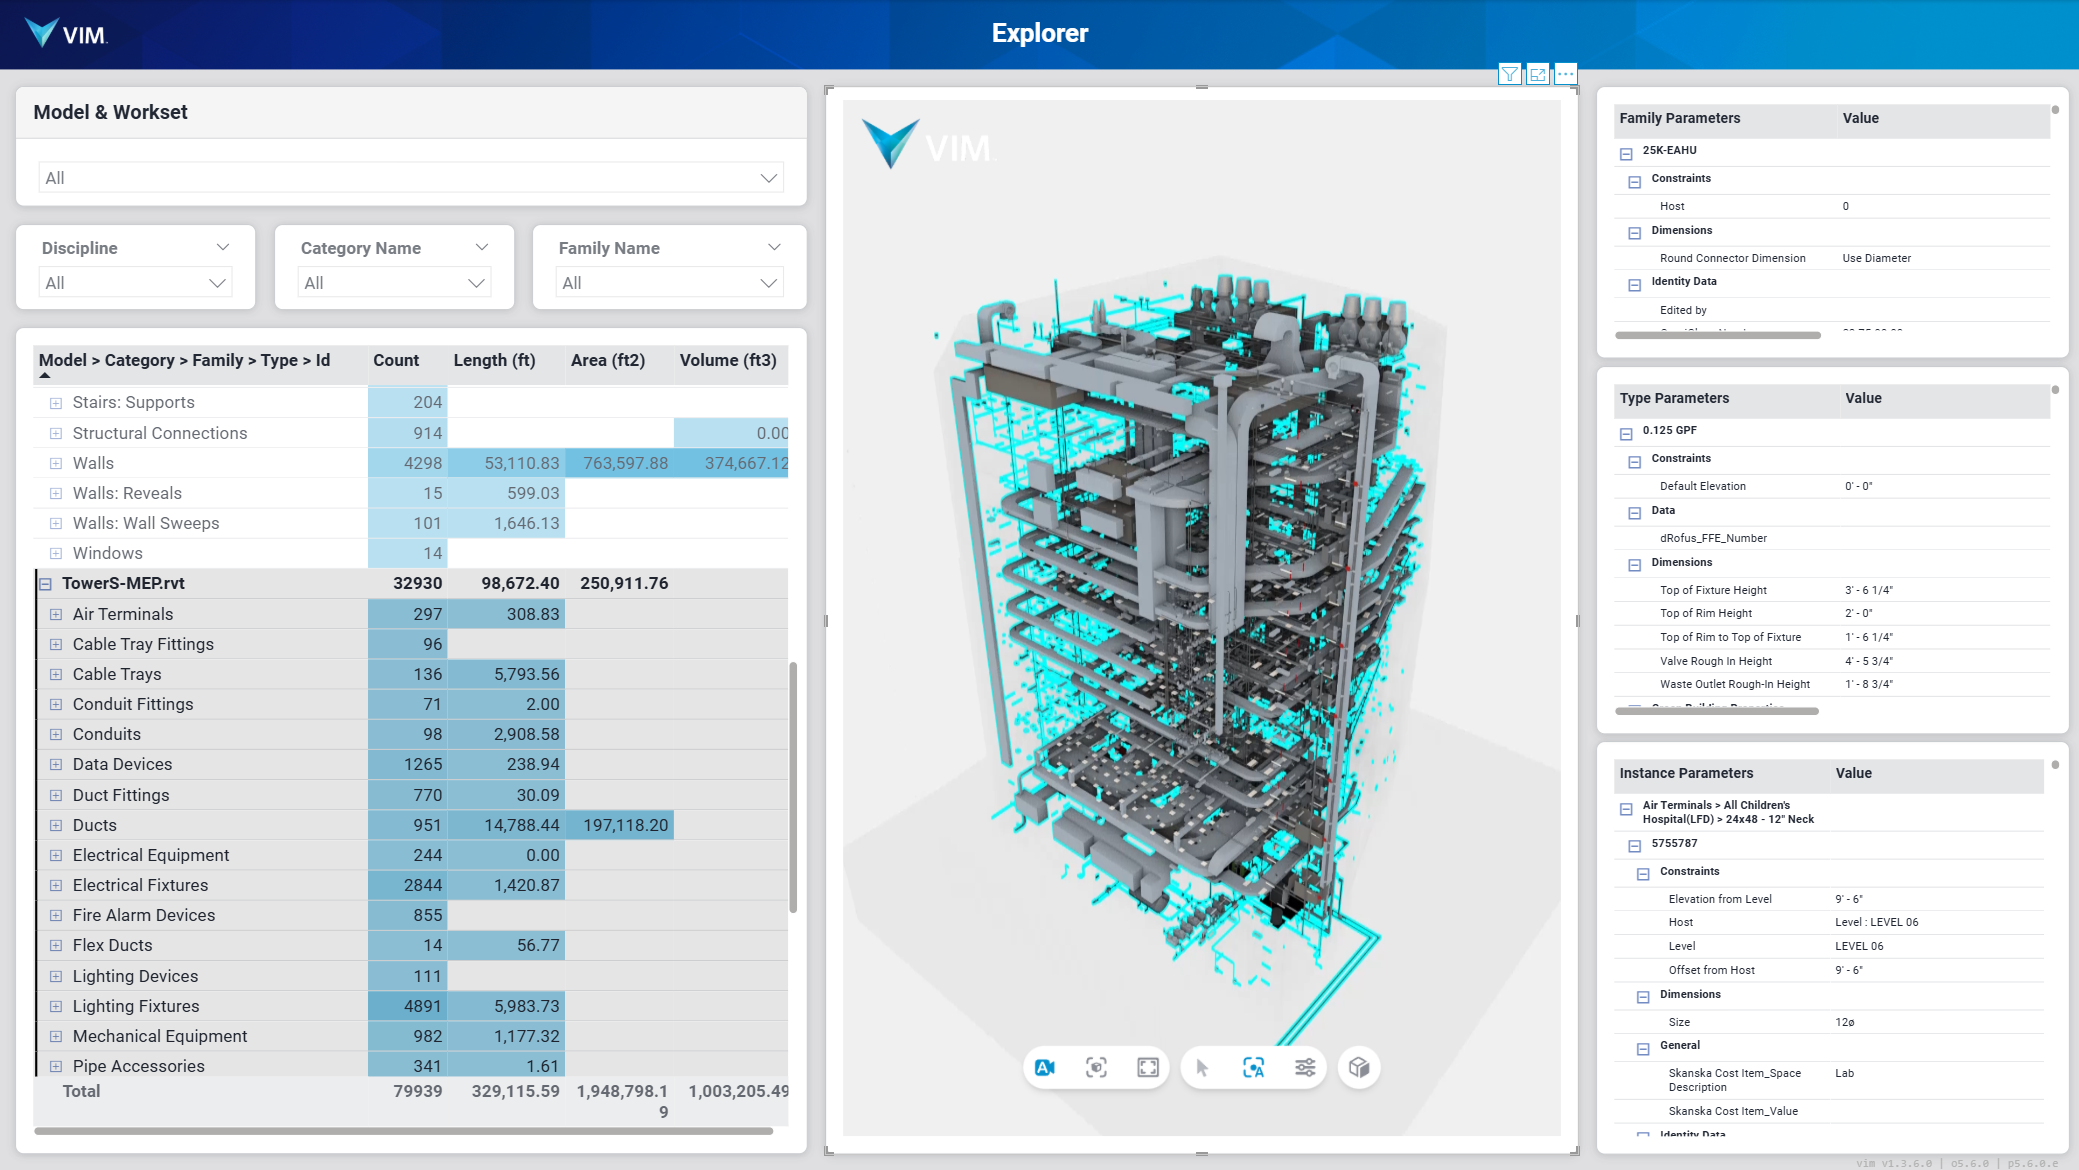
Explorer Page
In the "Explorer" page, you can visualize your model to obtain counts and common measures like lengths, areas, and volumes.
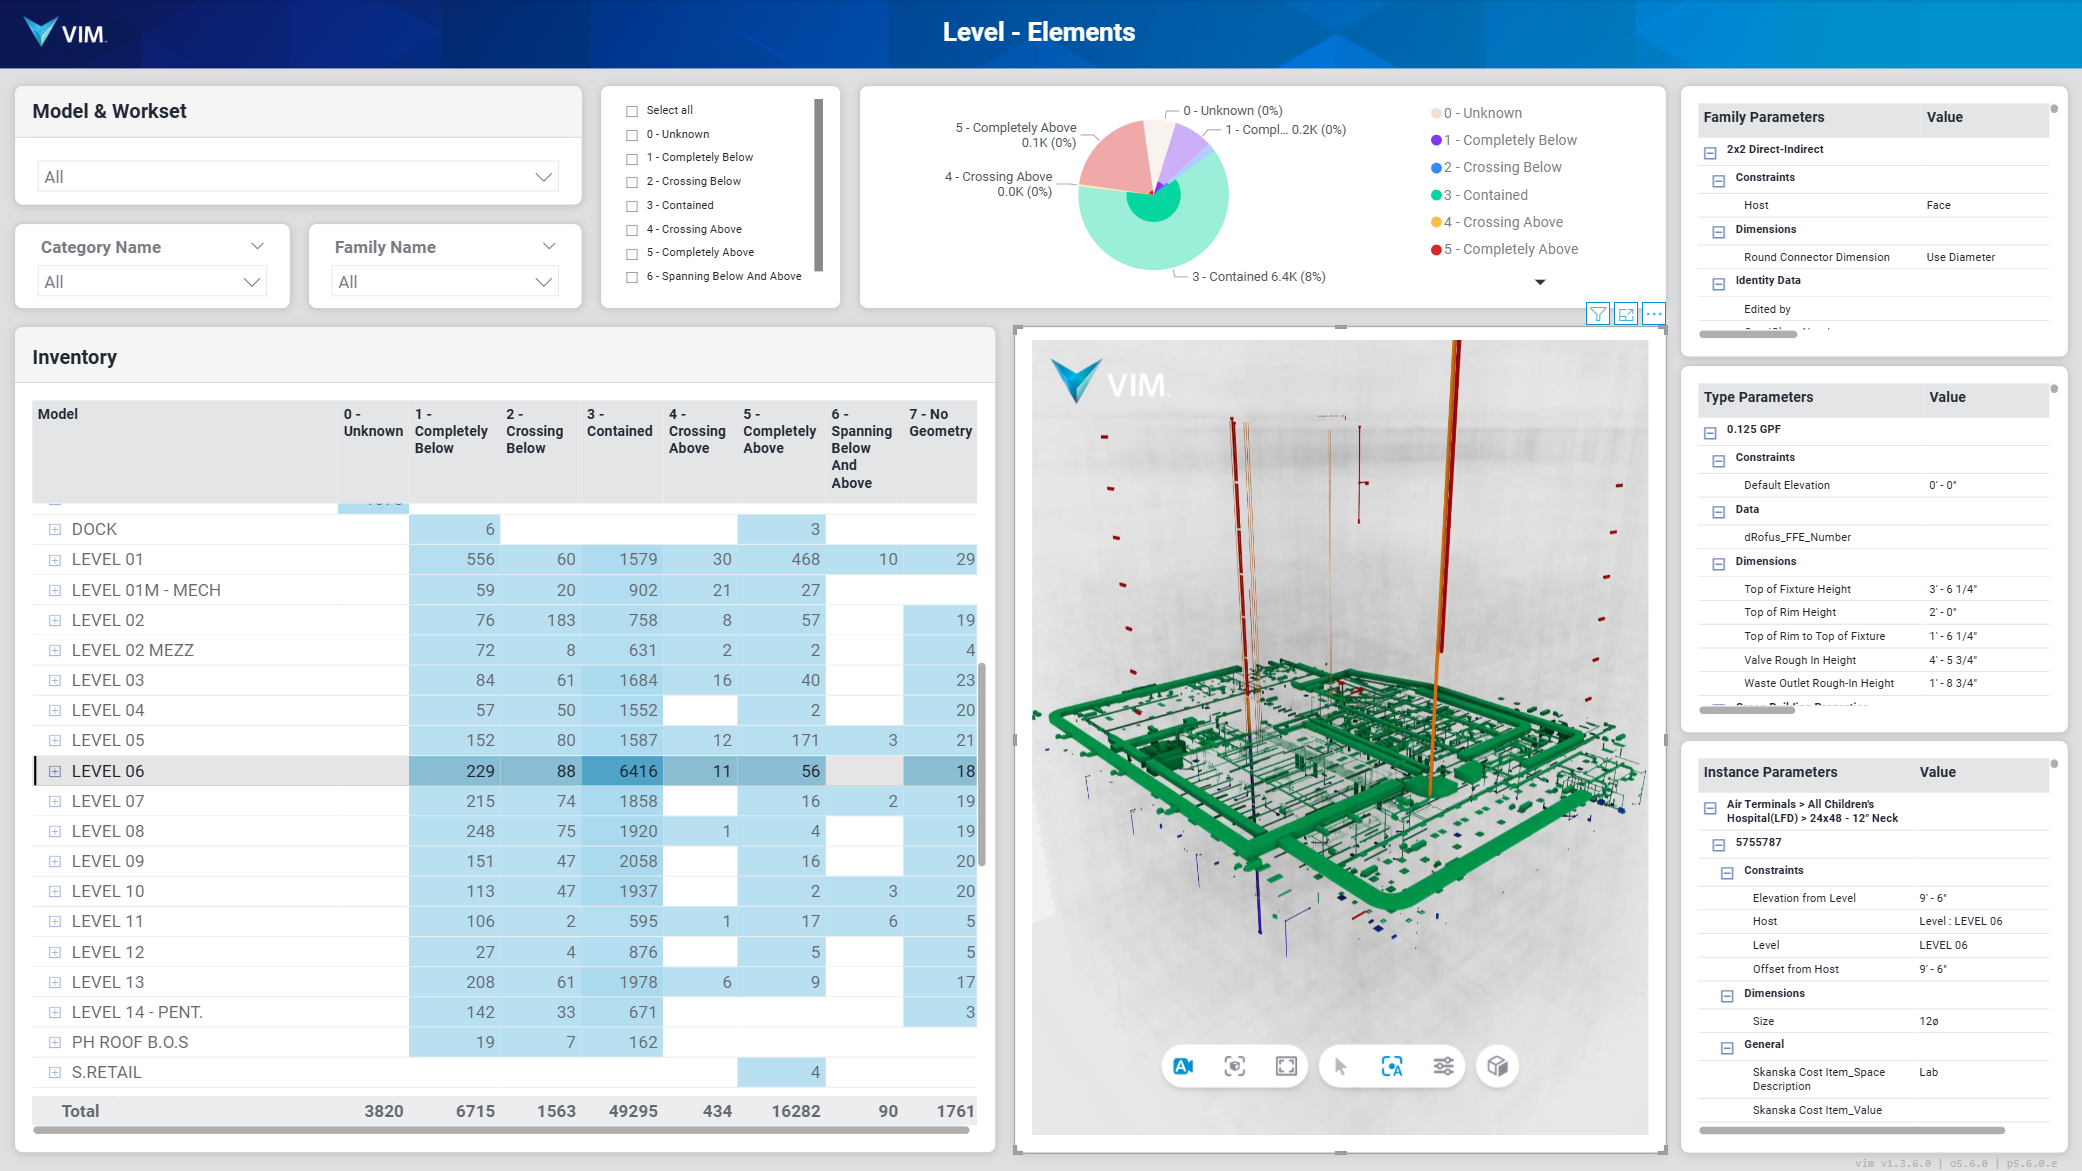
Level Elements Page
In the "Level Elements" page, you can analyze the geometric containment of elements among your building stories. This is useful to isolate the elements which may have been modeled with incorrect level associations.
We invite you to discover and customize the wide collection of report pages in our template!
Getting Started
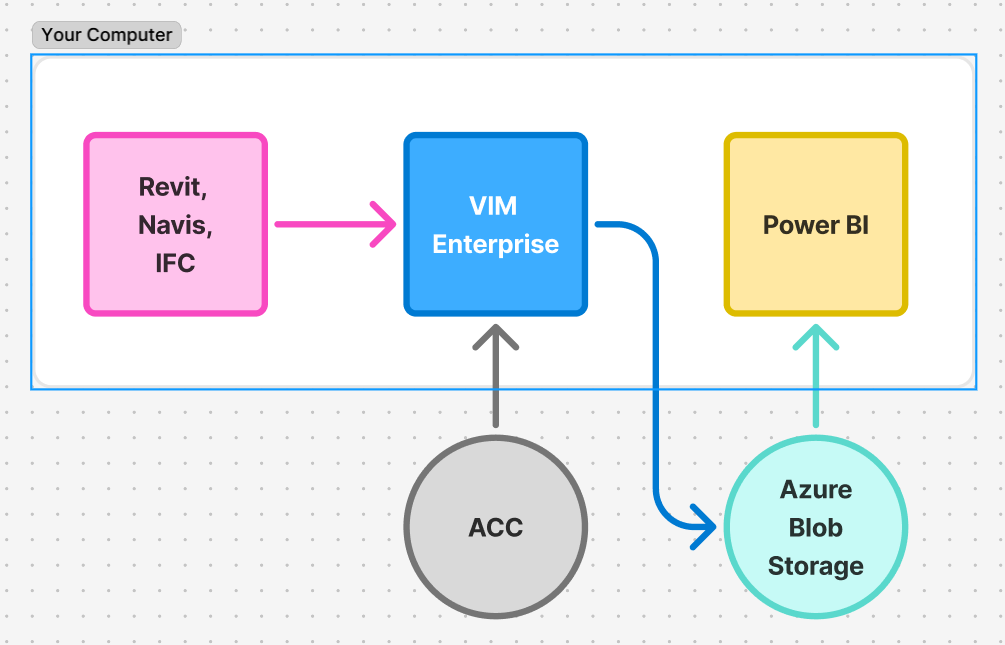
The diagram below illustrates the components involved with VIM Enterprise.
Where does the data come from?
A VIM Enterprise project first defines the source from which the VIM file will be created. The source can be an Autodesk Construction Cloud (ACC) project, a local Revit project, a local Navisworks project or an IFC file. A VIM file is created from the specified source and stored in a local folder defined in the project settings.
Where does the data go?
The BIM data from the locally stored VIM file is converted into Parquet files which are uploaded to your Azure Blob Storage account. From there, your data can be loaded into Power BI and used to generate reports.
Because Power BI requires a URL address to display the 3D mesh data in the embedded VIM Power BI Custom Visual, a copy of the locally stored VIM file is also uploaded to your Azure Storage Account.
What can I do with the data?
A sample Power BI template is provided with the VIM Enterprise installation package to get you started generating reports. The template contains several pre-configured Power BI report pages. You can modify the provided template as required or create your own templates.
How do I update my report?
To ensure your Power BI reports have the latest data, you can run VIM Enterprise projects manually to update from the project source, or you can schedule your projects to run at a specific time and day. After a VIM Enterprise project has been updated, the data source must be refreshed in Power BI.
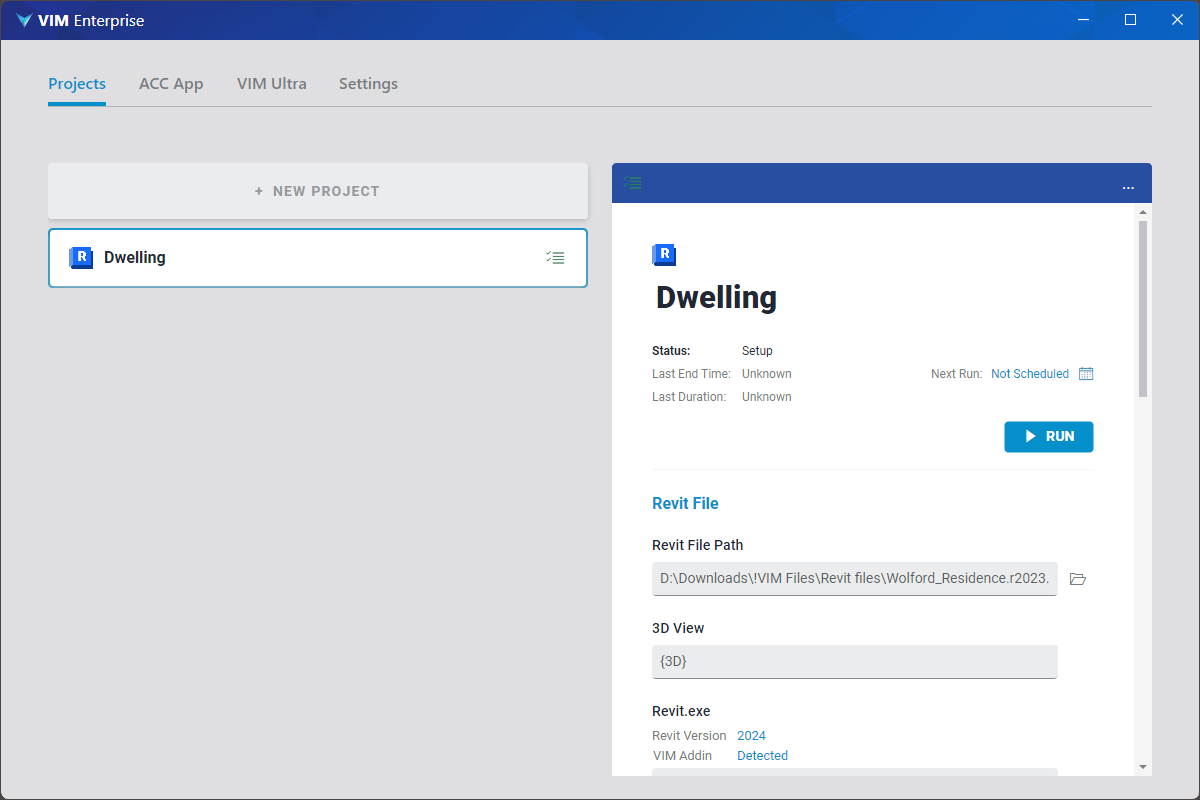
Setup
Please follow the steps below to get up and running with VIM Enterprise.
-
Install VIM Enterprise on the target machine
-
Configure ACC (only required if using ACC as the project source)
-
Create your project for ACC, Revit, Navisworks, or IFC. You can also merge VIM files from existing projects or VIM files.
-
Press the "Run" button to update your project